How to Use a Mockup?
If you’ve downloaded an amazing mockup but aren’t sure how to use it, don’t worry! Using mockups may seem tricky at first, but it’s actually a simple process that can take your design presentations to the next level.
In this article, we’ll guide you step by step on how to use a mockup correctly, along with some tips to make the final result even more realistic and professional.

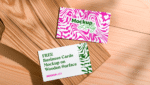
Click here to download this mockup
What is a Mockup and Why Use It?
Before we dive in, here’s a quick recap: a mockup is a visual template that simulates a design applied in a realistic context. Instead of just displaying raw artwork, a mockup lets you see how it would look when printed, applied to a product, or displayed on a screen.
Using mockups makes your presentation more professional, improves client communication, and helps you test your design before final production. Now, let’s get to the main point: how to use a mockup!
Step-by-Step: How to Use a Mockup in Photoshop
1. Open the mockup in Photoshop
After downloading and extracting the file, open the mockup in Adobe Photoshop. The PSD file usually contains well-organized layers for easy editing.

2. Find the “Your Design Here” layer (or similar)
Mockups typically have a layer named “Your Design Here”, “Place Your Design Here”, or something similar. This is a Smart Object layer where your design will be inserted.

3. Replace the design
• Double-click the Smart Object thumbnail.
• A new document will open.
• Replace the existing artwork with your design.
• Adjust the size if needed to fit properly.

4. Save and close the Smart Object window
After inserting your design, simply save (Ctrl + S or Cmd + S on Mac) and close this window. When you return to the main mockup file, your design will be automatically applied to the scene.

5. Adjust and export
If needed, make final adjustments, such as opacity, shadows, or lighting effects to enhance realism. Then, export the final image in JPG or PNG format to share your project!
Alternatives to Photoshop
If you don’t use Photoshop, here are some easy alternatives for editing mockups:
1. Photopea (Free & Online)
Photopea is a free online tool that supports PSD files and allows you to edit Smart Objects, just like Photoshop.
2. Canva (Limited, but functional)
Canva does not support PSD files, but you can use PNG mockups and manually overlay your design. It’s not as efficient as Photoshop but works for simple presentations.
3. Figma & Adobe XD
If you work with digital design, you can use Figma or Adobe XD to simulate interface mockups without needing Photoshop.
Tips to Make Your Mockup More Professional
Now that you know how to insert your design into a mockup, here are some tips to make the final result even more realistic and impressive:
• Choose a mockup that enhances your design – A good mockup should complement your artwork, not steal attention from it.
• Adjust shadows and lighting – Small adjustments can make a huge difference in realism.
• Use high resolution – Always work with high-quality images to prevent your design from looking blurry or pixelated.
• Try different mockups – Testing your design in various contexts helps you see how it performs in different applications.
Using mockups is one of the easiest ways to present a design professionally and convincingly. With just a few clicks, you can transform a simple artwork into a visually impactful presentation.
Now that you know how to use a mockup, why not check out our free collection at Mockup Lady and start testing your creations?